Game Maker Studio Resource Types
Game Maker has many different resource types to work with, but some are more important than others. When starting out your bread and butter will be Sprites, Objects, and Rooms. Let’s quickly create some, and then run our game for the first time
Sprites
Sprites are essentially pictures / images. In general, the term usually refers to small, 2D, pixel art images, however in Game Maker all images (character art, backgrounds, tilesets, etc), are initially created as sprites.
There’s a lot of ways to create sprites, but my prefered method is to right click on the sprites folder and select “Create > Sprite” (if you want to be fancy you can also hit ALT+S). This will spawn a sprite resource window in your workspace. We’ll name the first sprite sPaddle
![]()
As a side note, the sprites folder, and folders in general, don’t really mean anything. You can drag sprites into other folders, and delete folders as you please. That said I still prefer to keep resources in their corresponding folders. This is why I specifically right click on the folder when creating new sprites.
![]()
Naming convention
We can name resources whatever we want in Game Maker, but most Game Maker users like to follow a convention depending on the resources. I start my names with lower case letter(s) for the type, then I capitalize the first letter of the name (this is called camel case). For example, sPaddle, oPaddle, and rmMenu are names for a sprite, object, and room respectively. I’ve also seen people use the snake case convention spr_paddle, obj_paddle, and rm_menu (this is more common than mine, but I like the shorter names).
🤓 If your curious, you can find the full list of word combining conventions here
Sprite Editor
Let’s make a paddle for the pong game!
By default, Game Maker will use 64x64 as the sprite size. But we want our paddle to be tall and skinny so we’ll also resize it to 32x128. To do this we’ll hit the resize button then adjust the numbers under “Scale Image” before hitting “Apply” (make sure to uncheck “maintain aspect ratio” box, since that will force the 2 numbers to be the same)
![]()
From here we can click “Edit Image”, this will open the sprite editor in a new tab. Then use the fill tool to make the entire image white. This will automatically update the sprite preview
![]()
For this course, we won’t be focusing too much on making the art ( it’s not really my skill), but here’s a handful of sprite editor tips to help you get by
| Paintbrush Tool | Left and Right click | ||
| Brushes | Change Color | ||
| Filled Rectangle Tool | Rectangle Outline Tool | ||
| Filled Circle Tool | Circle Outline Tool | ||
| Erase Tool | Line Tool |
To put your skills to the test, go ahead and add sBall (16x16) and sWall (64x64)
![]()
Navigating the workspace
Now that we have our first resources in the workspace, let’s talk about how you can navigate the workspace
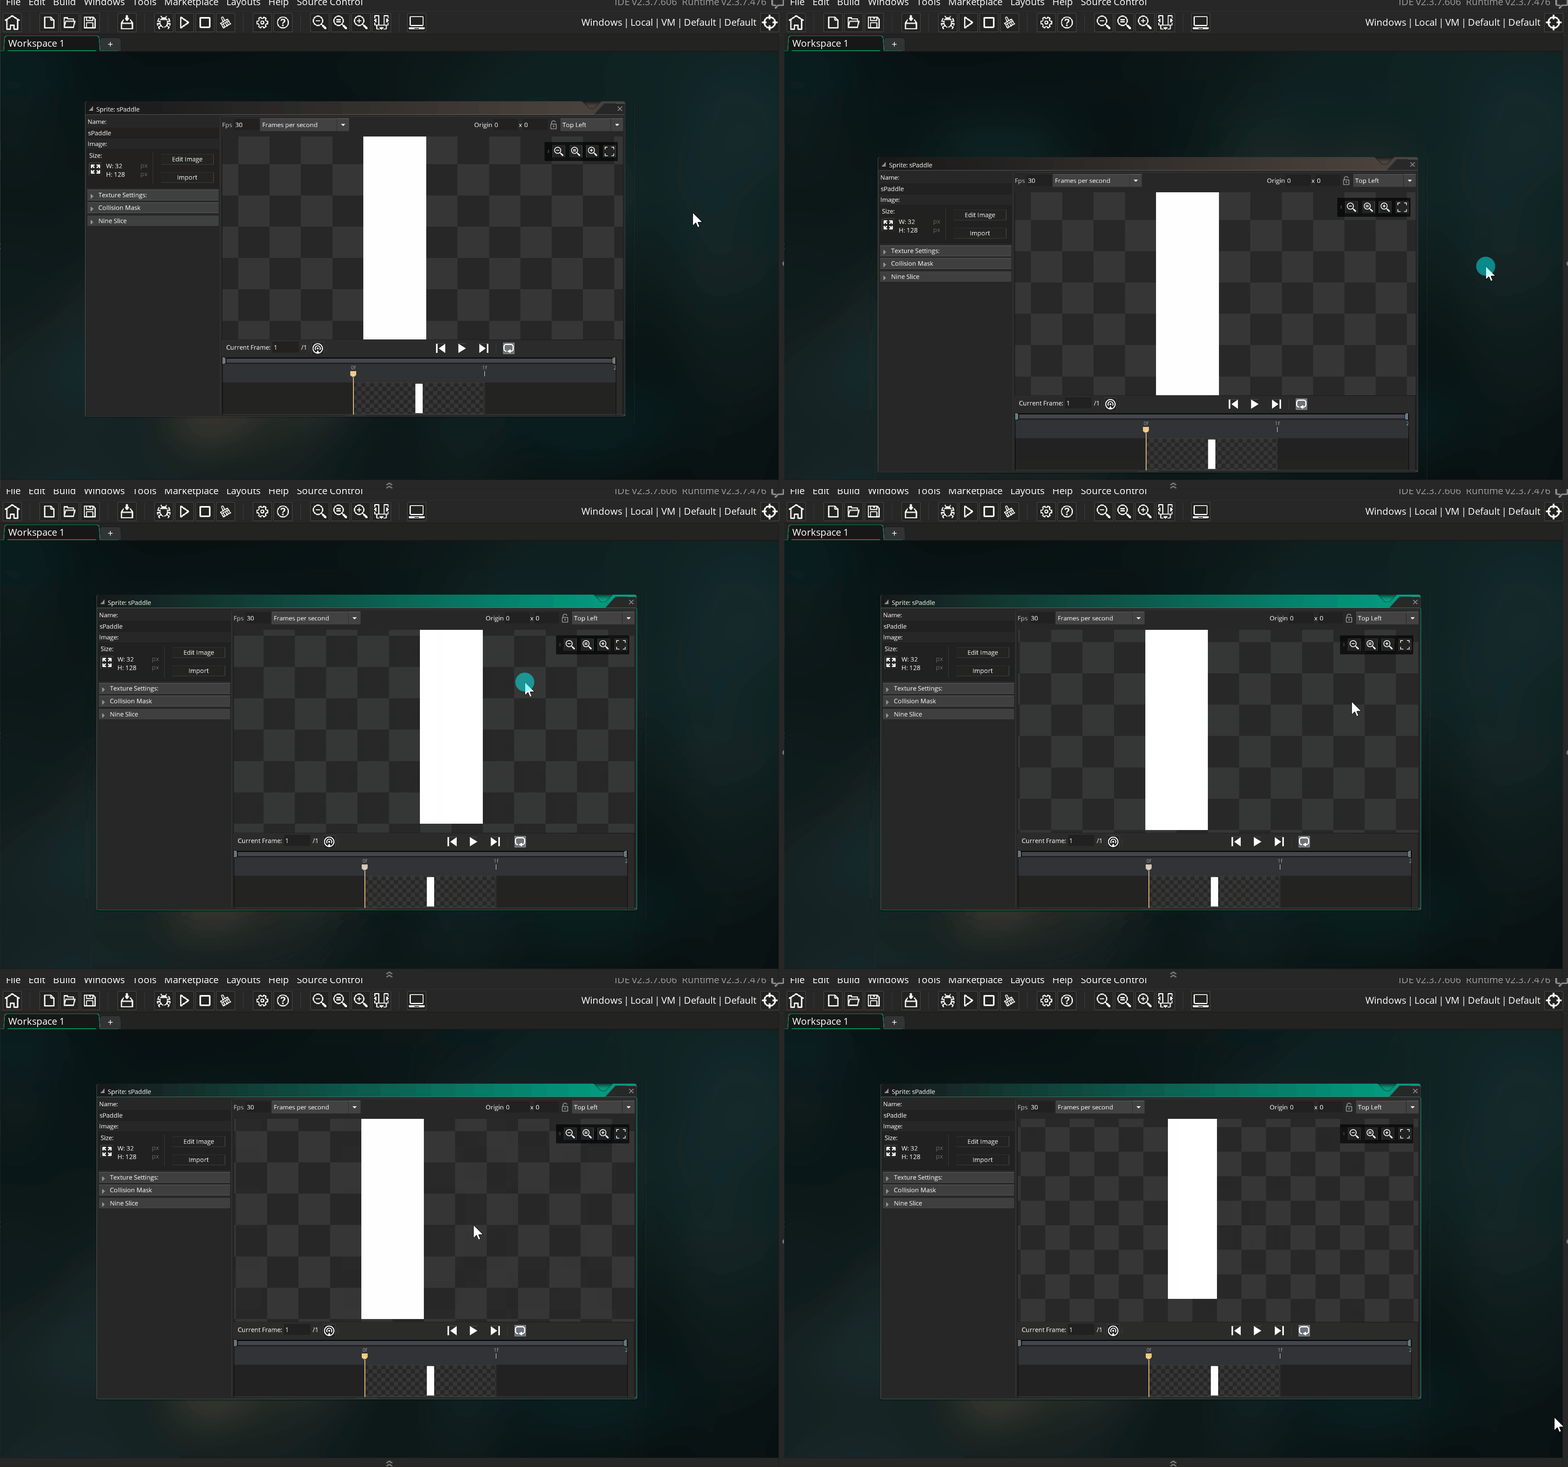
There’s 2 main methods for navigation
- Panning: Hold the middle mouse button, and move the mouse to shift the view
- Zoom: Hold the ctrl button on the keyboard, and then scroll the mouse wheel to zoom in/out on the view
The initial mouse position is VERY IMPORTANT. If you’re mouse is hovering over the workspace background, then you’ll be adjusting the workspace view, but if you start out in the sprite preview, you’ll be adjusting the sprite preview. This is cool, since you only need to learn these tricks once, but then you get to use them repeatedly throughout game maker (including the Room Editor later on)

Latptop Mode: If you’re using a laptop touchpad, you probably don’t have a good way to center click. In this case you can use Game Maker’s “Laptop Mode” and use an alternate control scheme
Objects
Next we’ll add objects for each of the sprites. You can think of objects as sprites with brains. We’ll be spending most of the course working inside objects making them smarter, but for now we’ll just make empty objects with sprites attached
Similar to the sprites, right click on the folder and select “Create > Object” to create an object (or hit ALT+O if you want to show off ). From there we’ll name the first one oPaddle
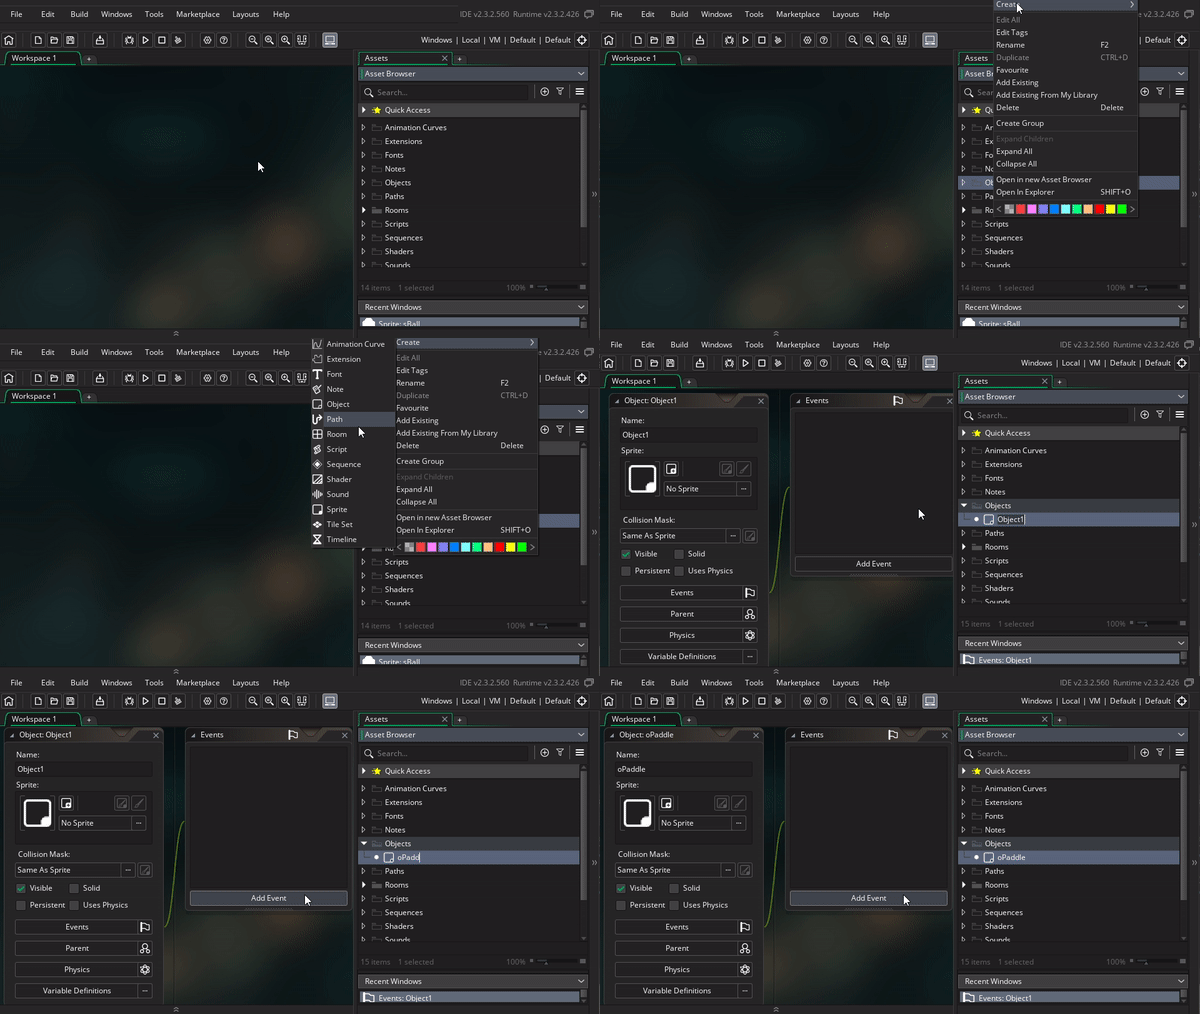
then we can set the sprite accordingly
![]()
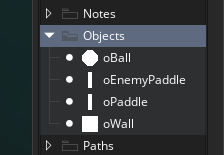
Rinse and repeat for oBall, oWall, and oEnemyPaddle (enemy paddle will use the same sprite as oPaddle, and that’s ok ;) )
Rooms
Rooms are essentially levels, it represents what we’ll be shown on the screen. We can place a bunch of objects, sprites, and other resources here to form levels, menus or any other room we can think of. (side note: most other game engines refer to rooms as “Scenes” )
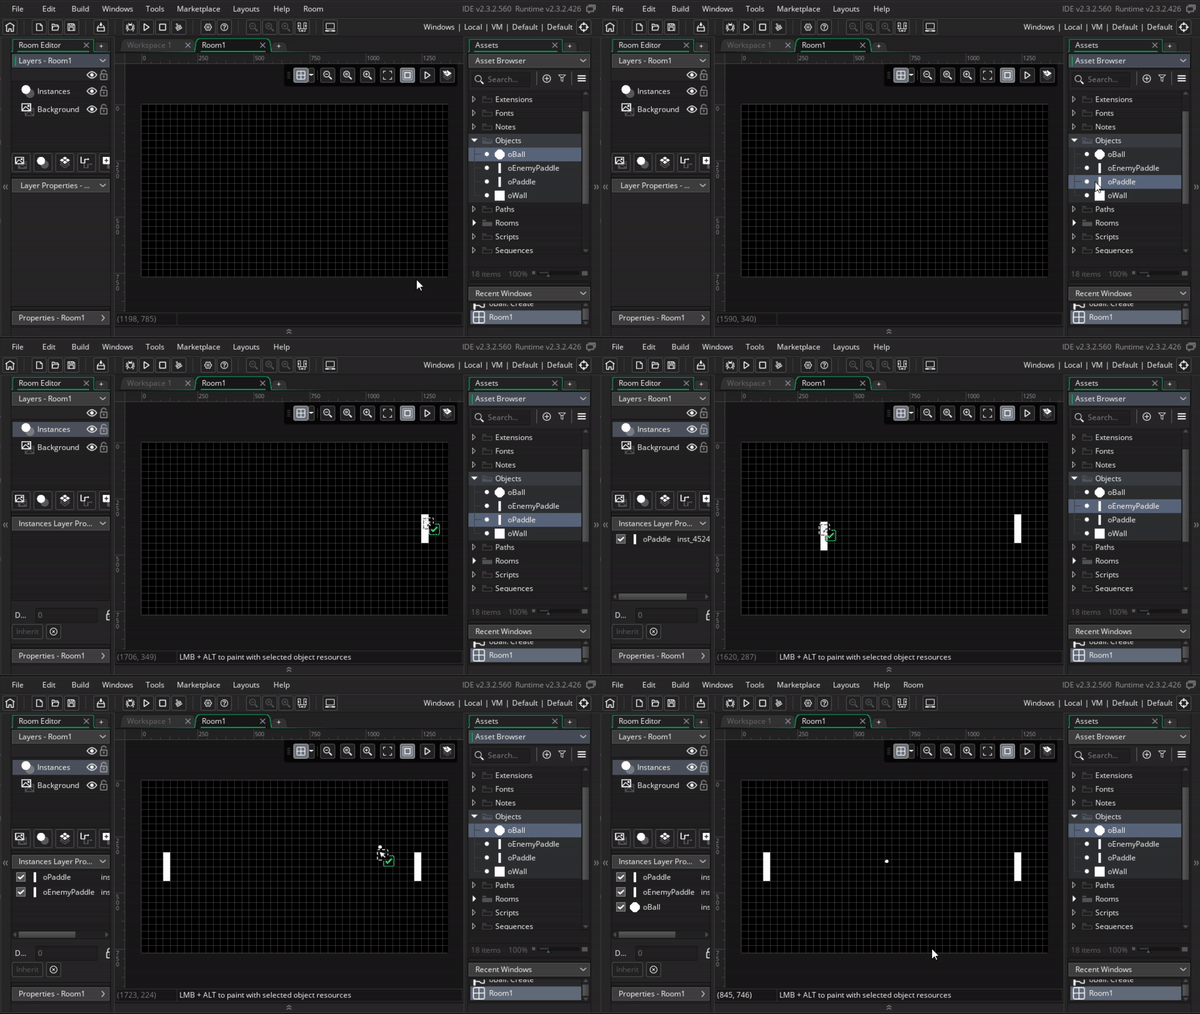
We’ll just use the default room for now. When we click in there, we can drag objects from our asset browser into the room (oh and make sure you have the Instances layer selected, we’ll get more into layers later). Go ahead and added the 2 paddles and a ball
Objects vs Instances
When I add objects to the room, they’re not technically objects anymore. They’re instances. You can verify this by double clicking on the instances. You get an instance window, and they have a different name. You can think of objects as a blueprints, and instances as creations (or instantiations) of the blueprints. This distinction is important because we can see each instance has properties, and instances can have different properties despite coming from the same object
As an example, let’s stretch some walls to span the top and bottom of the room. When we do this you can see the scale properties can be different for each instance.
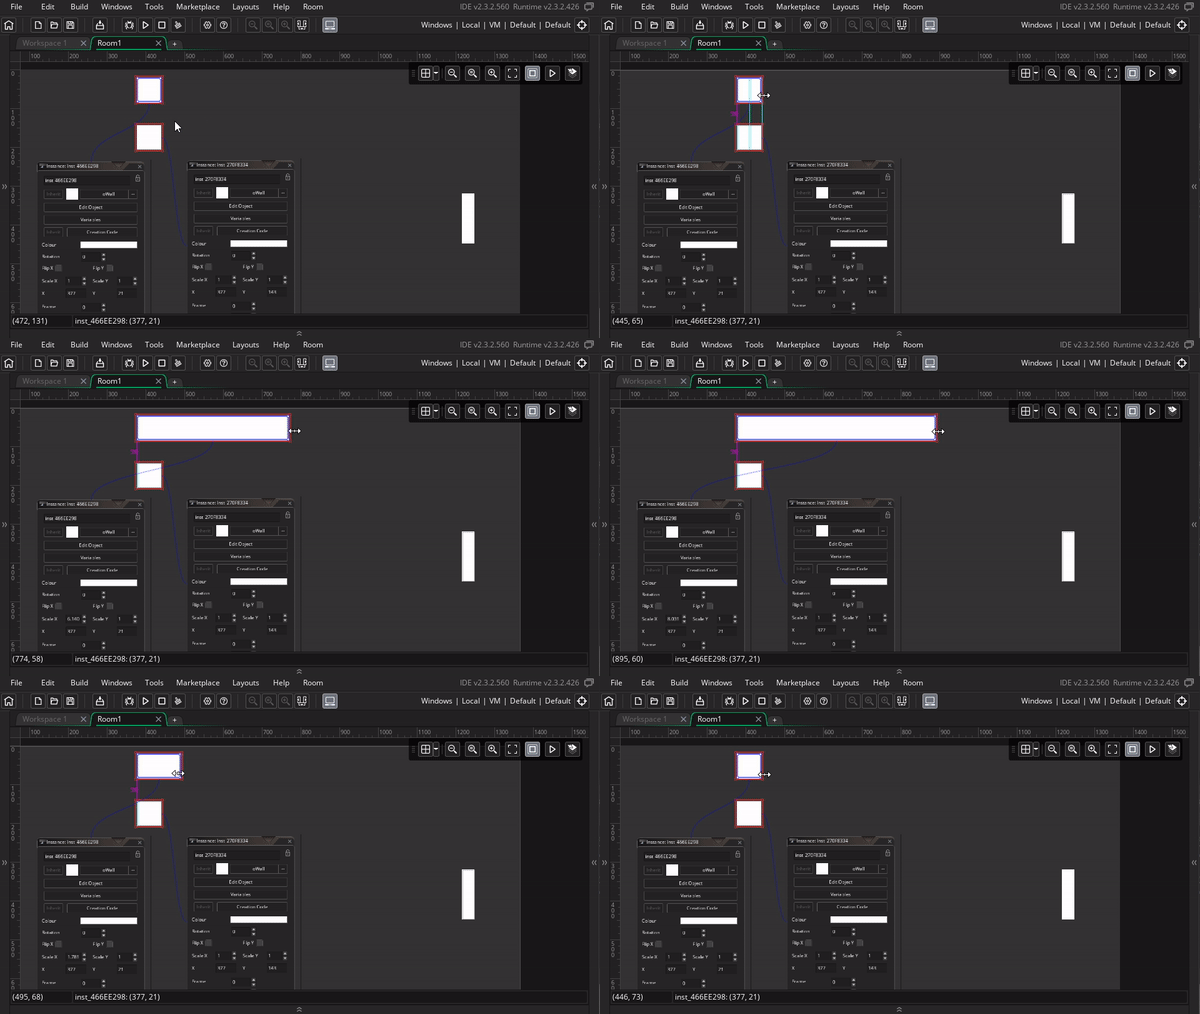
We’ll be digging a lot more into properties as we go, but this is enough for now to complete our first level :D. Your room should now look as follows
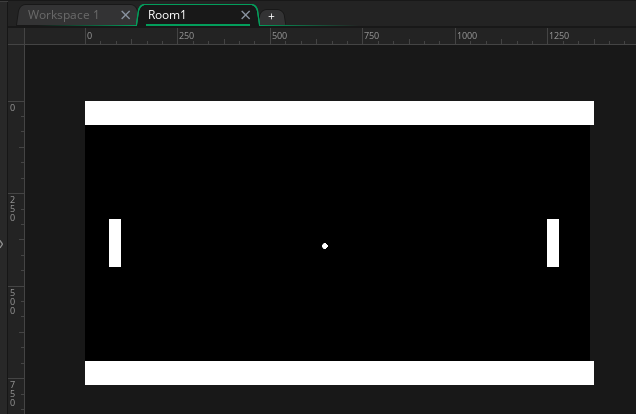
NOTE: Java and many other languages have the concept of static vs non-static. It’s very confusing to new students, but the concept is identical to the object vs instance distinction we just made. So if you’re learning that in the future, and get confused, feel free to come back here for a refresher ;)
Layers
We’re almost ready to run the game, but before we do I quickly want to highlight room layers. As you’re adding resources to your game, you can use the layers to determine what order they’re drawn
In this case we can see all the instances are under the Instances layer. You can tell by toggling the visibility on the layer, as well as seeing the instance list under the instance layer properties
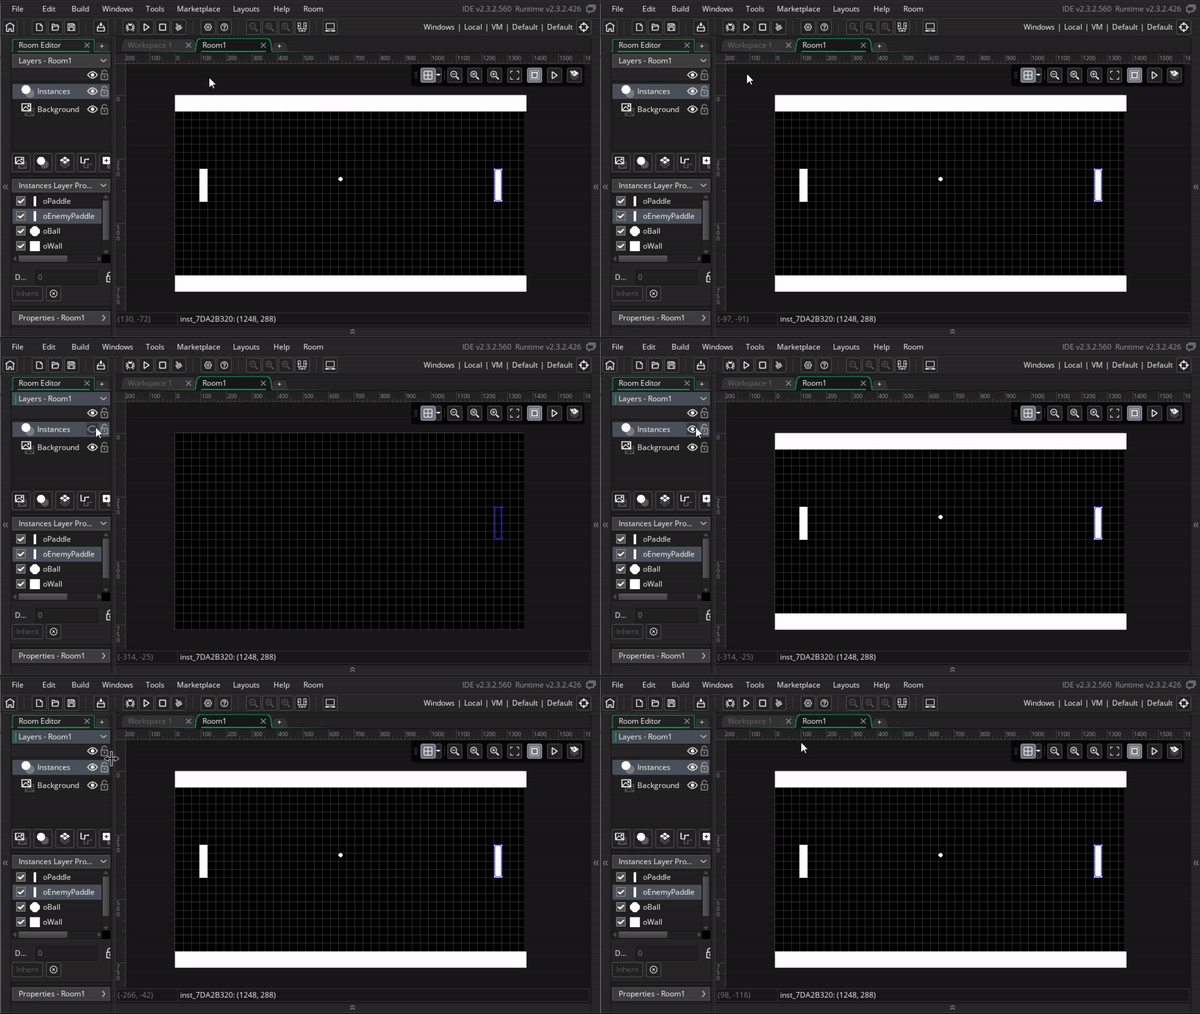
The other default layer is the Background layer. All this layer does is fill the room with this solid black color. We can change the color if we dig into it’s properties, it works pretty much the same as the color selection from the sprite editor
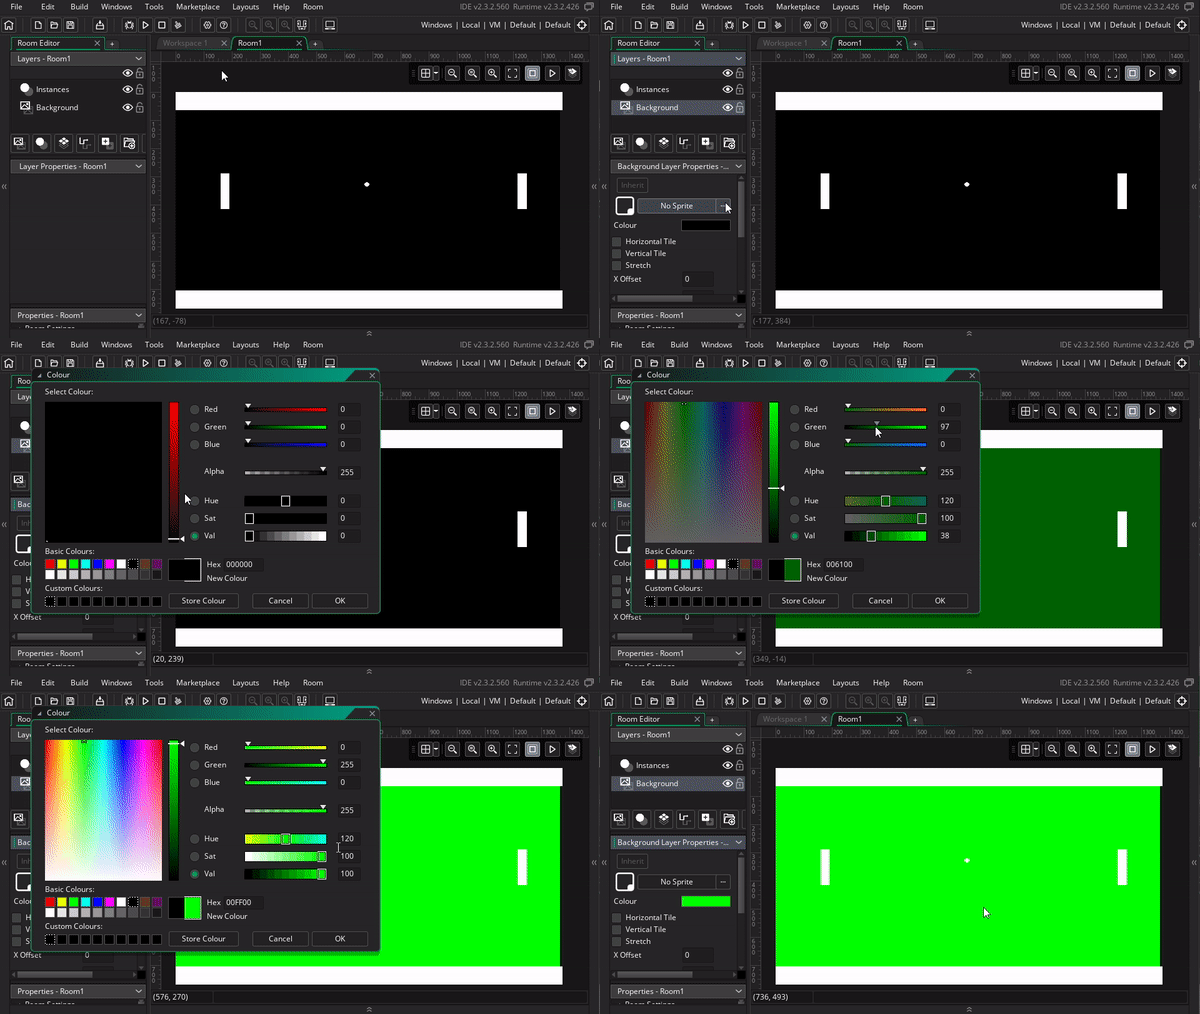
As a test to see the layer order in action, we can swap the order of the Background and the Instances layer. You’ll notice that all our instance dissapear because now they’re behind the background
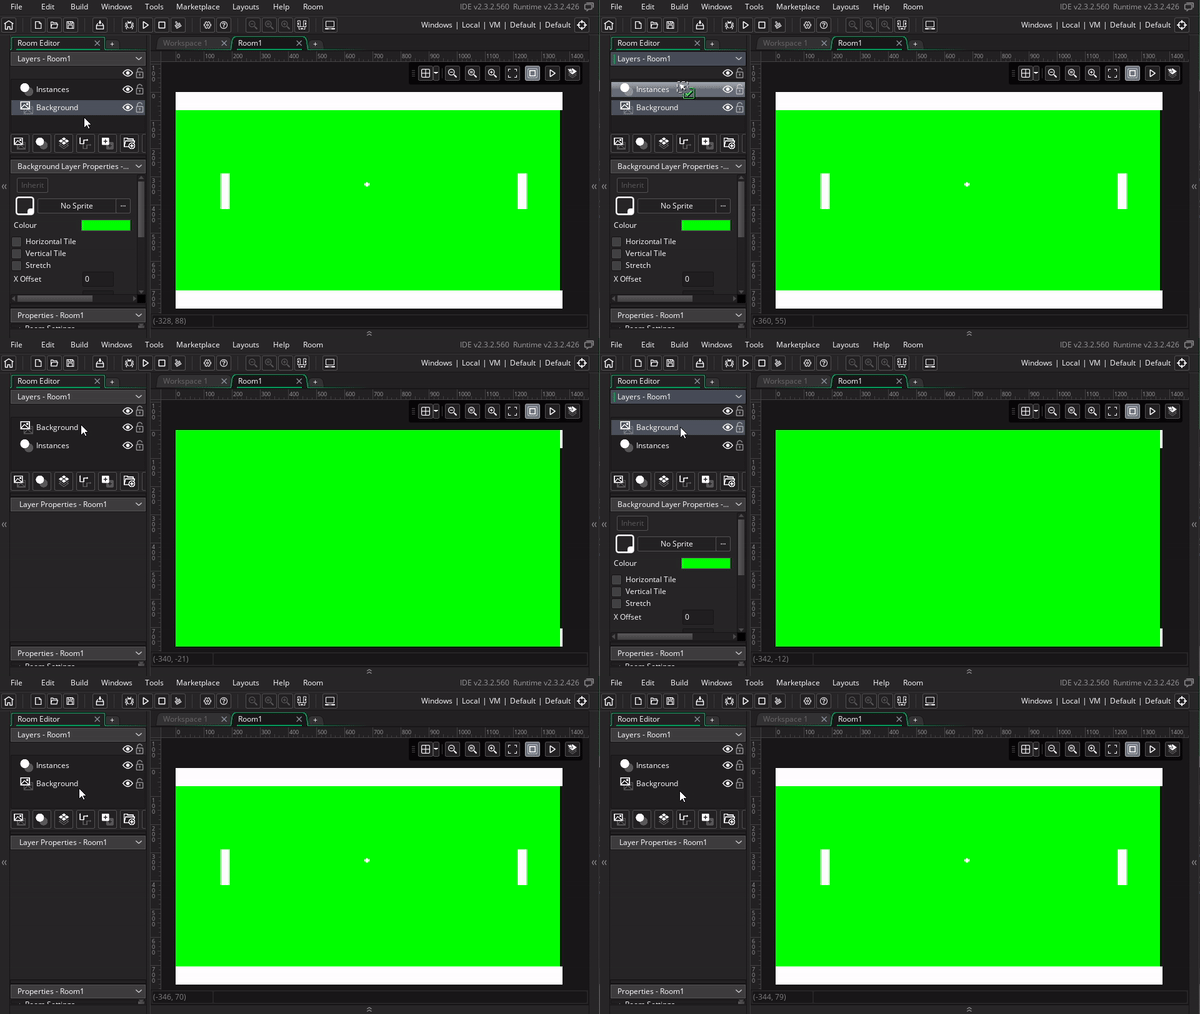
There are several more layer types, and we’ll be diving into most of them, but sticking to these 2 will be sufficient for now
Run the game
When your room’s ready, you can hit the run button in the toolbar (or F5) to start the game

Then we’ll see our level in the game window 😍
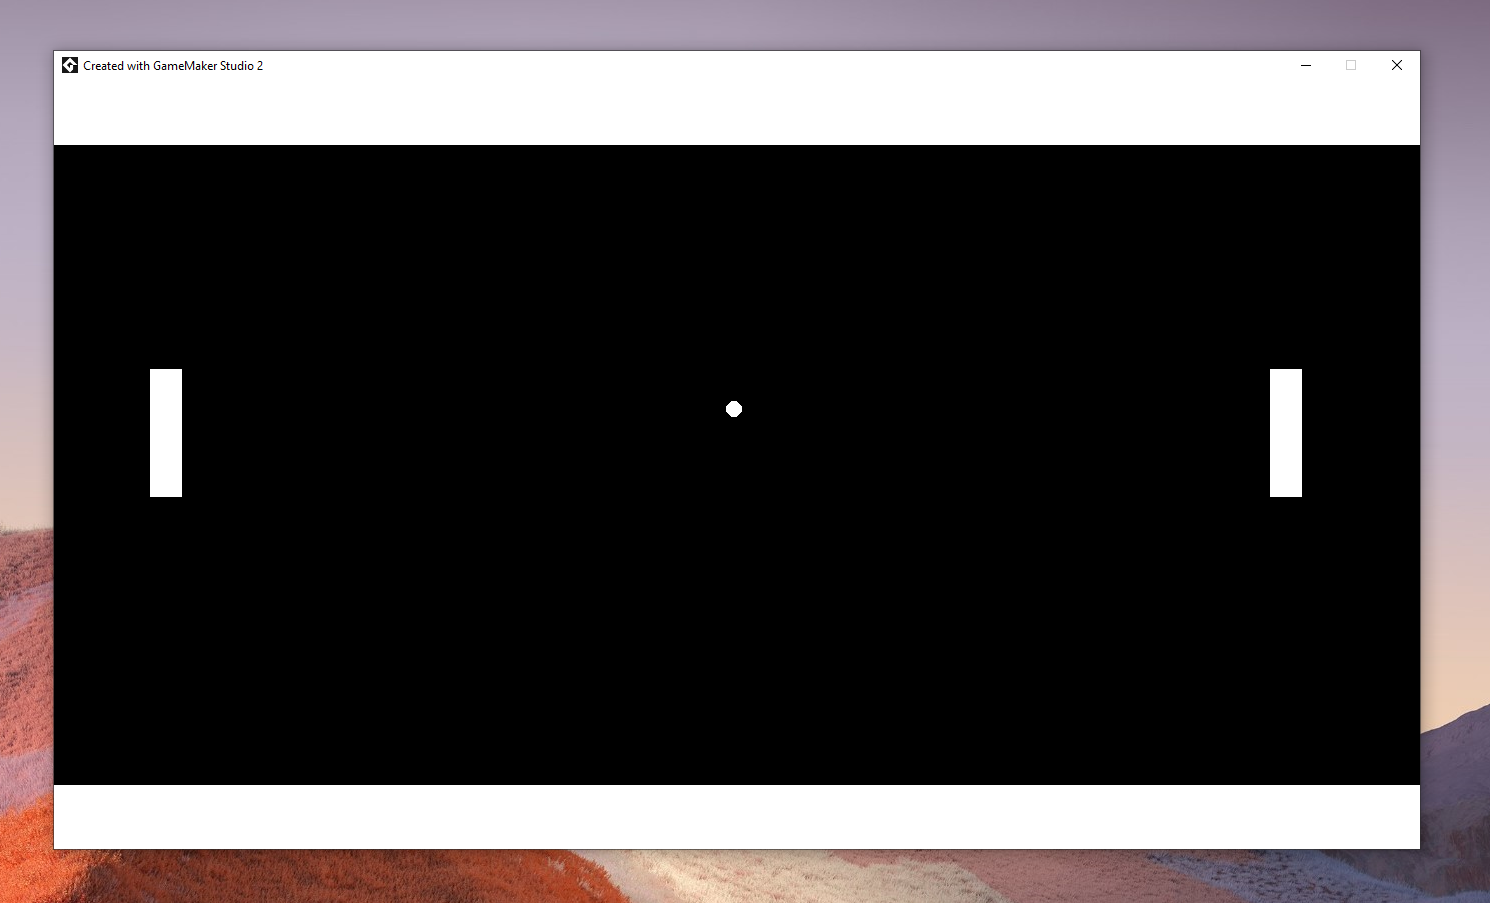
This is a special moment, you just made something, and it’s running in real life program on your computer. It’s beautiful 🥲